Creating API Keys
- Navigate to API Keys: Access the API Keys page within your workspace. This can typically be found within the Workspace Settings or a dedicated API Keys tab.
- Click “Add New Key”: Look for the “Add New Key” button and click on it to initiate the key creation process.
-
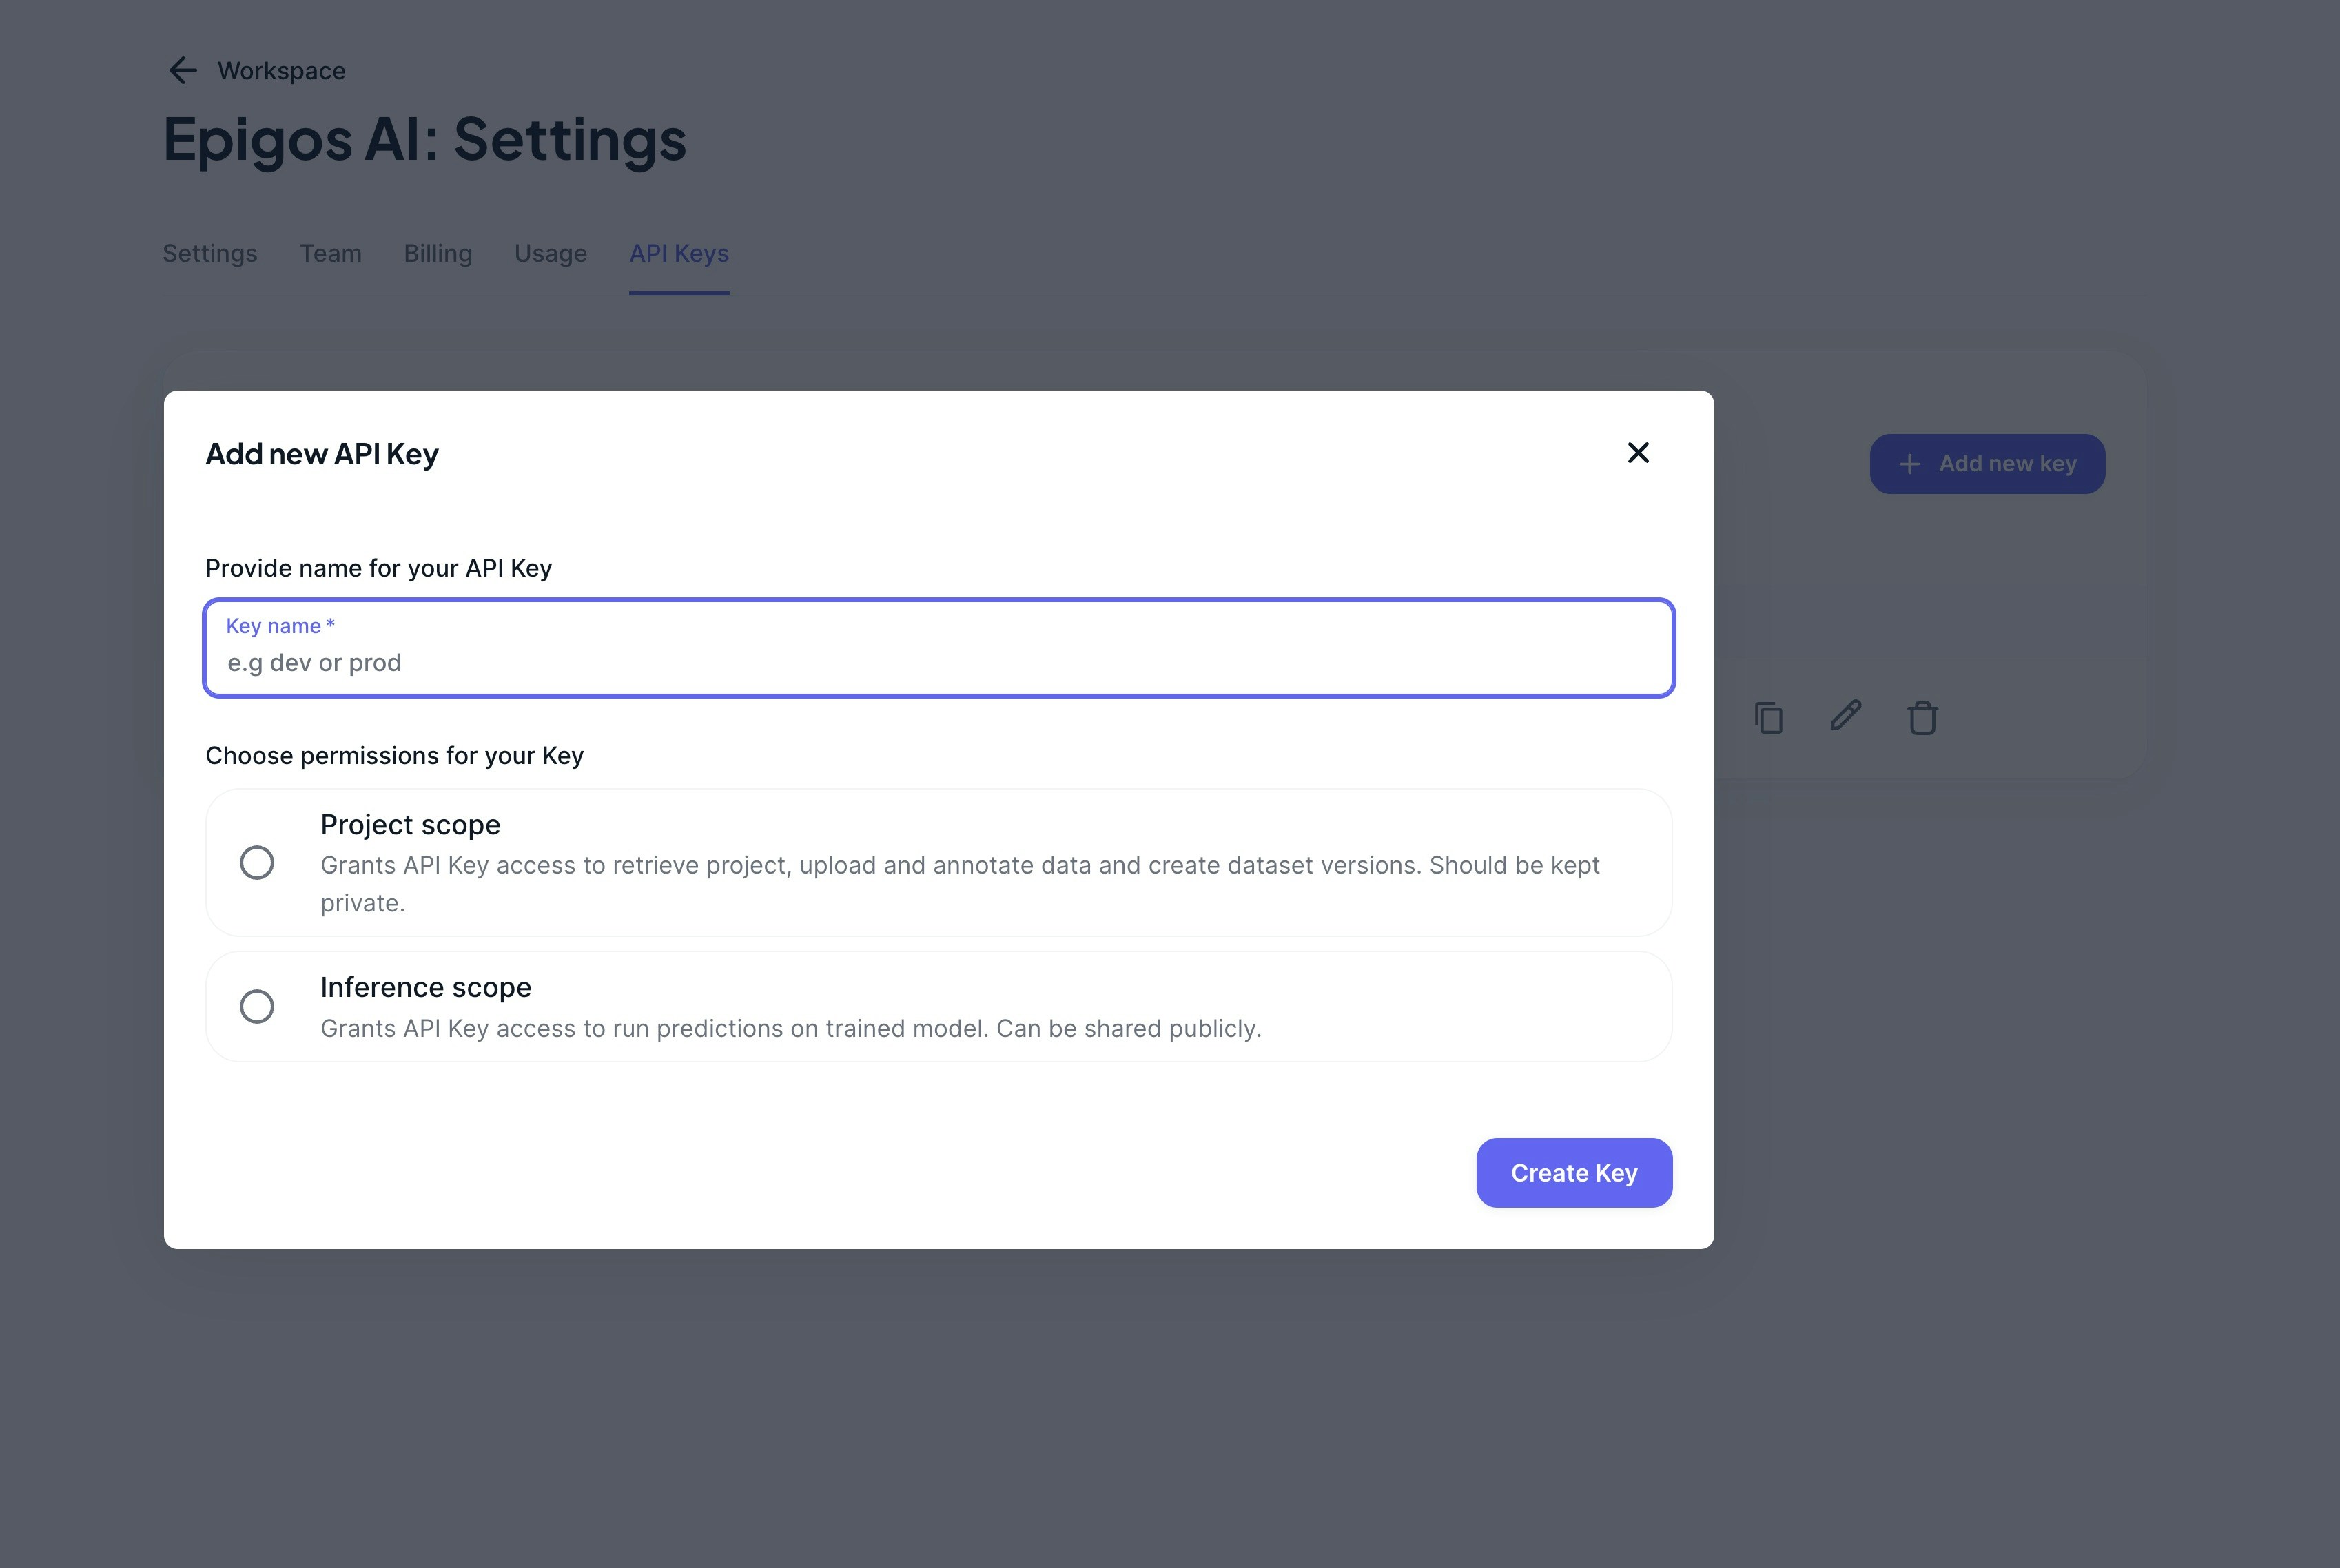
Fill in Details: In the modal form that pops up, provide the necessary details for the new API key:
- Name: Enter a descriptive name for the API key to easily identify its purpose or usage.
- Scope: Choose the appropriate scope for the API key.
- Generate Key: After filling in the details, proceed to generate the API key by clicking the “Generate Key” button.
- Copy Secret Key: Once the API key is generated, a secret key will be generated as well. Copy this secret key and store it securely in a safe location. This secret key will be used to authenticate API calls.
API Key Scopes
- Project: Provides access to manage projects, upload datasets, train models, and make predictions.
- Inference: Provides access to make inferences on trained models. Can be used for public access to the models.
Managing API Keys
Once created, you can manage your API keys effortlessly:- Edit Scopes: If needed, you can edit the scopes of an existing API key to adjust its access permissions.
- Delete Key: If an API key is no longer needed or compromised, you can delete it by clicking on the trash icon next to the respective key.
Best Practices
To ensure the security of your API keys and the integrity of your workspace, consider the following best practices:- Store Securely: Always store API keys securely in a safe and accessible location. Avoid sharing them publicly or exposing them in plaintext.
- Rotate Regularly: Rotate API keys periodically to mitigate the risk of unauthorized access or misuse.
- Scope Appropriately: Assign scopes to API keys based on the principle of the least privilege, granting only the necessary access permissions required for their intended use.